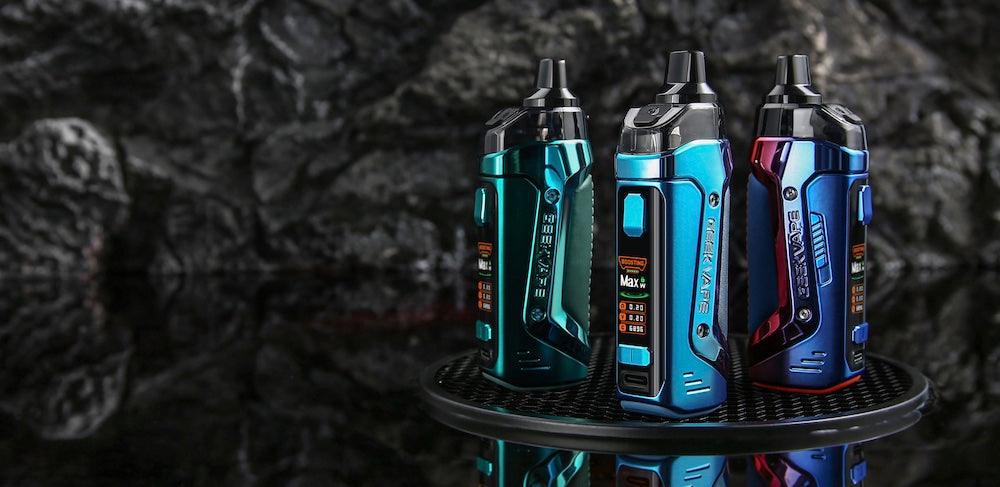
The Geekvape B60 is the latest device in the famed series of Geekvape Aegis Boost pod systems. Also known as the Aegis Boost 2, the Geekvape B60 is compact, stylish and very powerful – it’s just about everything that you could ever want in a pod mod.
The one thing the Geekvape B60 isn’t, though, is easy to discern from the many other devices in the Geekvape Aegis series unless you’re already a Geekvape fan and are familiar with the product range. One of the most prominent strong points of the Geekvape Aegis devices is that there’s something for just about everyone. The weak point, though, is that it can be difficult to tell which of the many devices is the right one for you – and that’s what we’re going to cover in this Geekvape B60 review.
So, are you looking at the wide selection of vape kits here at VapeJuice.com and trying to decide whether the Geekvape B60 is going to be your next vape? In this review, we’re going to help you figure it out. We’ll start by discussing some of the prices associated with this device, and then we’ll continue by explaining the features that make it unique. Let’s dive in!
What Is the Price of the Geekvape B60?

The Geekvape B60 kit includes everything that you need in order to get started with this device, but it’s a good idea to know all of the associated costs because you’re going to need replacement parts from time to time. Here’s how much the Geekvape B60 and its replacement parts cost.
- Geekvape B60 Kit: Costs $35.49. The kit includes the Geekvape B60 device along with one pod, two coils, a coil removal tool, a spare drip tip, a charging cable and an instruction manual.
- Geekvape B60 Pods: Cost $7.49 per two-pack. The replacement pods do not include coils. Since the Geekvape B60 uses a pod with replaceable coils, you can continue using the same pod for as long as you like.
- Geekvape B60 Coils: Cost $12.95 per five-pack. The Geekvape B60 is compatible with all coils in the Geekvape B series. Five different coil resistances are available, ranging from 0.2 to 1.2 ohm – so you should have no trouble finding one that suits your vaping style. The Geekvape B60 kit includes the 0.2- and 0.4-ohm coils, which are optimized for direct-to-lung inhaling and work best with lower nicotine strengths.
What Makes the Geekvape B60 Special?

Now that you understand what kind of investment you’re making when you buy the Geekvape B60, why is this a device that you might want to buy in the first place? Here are this device’s key features.
- It has an updated design with racecar-inspired lines and a curved color display.
- It has the IP68 rating for ingress protection. The IP68 rating means that dust can’t penetrate it, and it’s resistant to water at a depth of up to 1.5 meters for up to 30 minutes. The Geekvape B60 is also shock resistant.
- It has a built-in 2,000-mAh battery and reaches a maximum power of 60 watts.
- It has a physical locking switch that prevents the device from activating accidentally when you carry it in your pocket.
- It has every vaping mode you could ever want, along with a couple of new ones. SMART mode automatically optimizes the device’s output for the best blend of flavor quality and coil life, and BOOST mode optimizes the device’s output for the best possible vapor production.
- It has an advanced boost-buck circuit that maintains a stable power output even as the battery reaches the end of its charge.
Geekvape B60 vs. Aegis Boost: Is It Worth the Upgrade?
If you already own the original Geekvape Aegis Boost, is it worthwhile to upgrade to the B60? Here are some of the key improvements that Geekvape has made to the B60.
- The Geekvape B60 has a maximum power of 60 watts, while the original Aegis Boost reaches a maximum of 40 watts.
- The Geekvape B60 has a redesigned pod with a side air inlet that improves flavor and helps to prevent leaking.
- The Geekvape B60 has an improved design with a better screen.
- The Geekvape B60 has the IP68 ingress protection rating, whereas the Aegis Boost has an IP67 rating.
- The Geekvape B60 has a higher battery capacity of 2,000 mAh. The Aegis Boost has a 1,500-mAh battery.
- The Geekvape B60 has a USB-C charging port, while the Aegis Boost charges via Micro-USB.
Geekvape B60 vs. B100: What’s the Difference?
The fact that Geekvape has changed the naming conventions for its devices might be a bit of a source of confusion for you, since the Geekvape B60 (formerly the Aegis Boost 2) and Geekvape B100 (formerly the Aegis Boost Pro 2) have very similar names. Here are the key differences between the two.
- The Geekvape B100 uses a single removable 18650 battery, whereas the Geekvape B60 has a built-in battery.
- The Geekvape B100 reaches a maximum power of 100 watts, while the Geekvape B60 has a maximum power of 60 watts.
- The Geekvape B100 uses its own pod. The two pods aren’t compatible with each other.
- The Geekvape B100 uses Geekvape P-Series coils, while the Geekvape B60 uses B-Series coils.
Other than the differences outlined above, the Geekvape B100 and Geekvape B60 are very similar to one another. You can think of them as being more or less the same, except that the Geekvape B100 uses a removable battery and offers a bit more power as a result.
How to Use the Geekvape B60

Now that you know just about everything there is to know about the Geekvape B60, it’s time to learn how to use the device. Since the Geekvape B60 is a proprietary pod mod, there are a few things about its operation that are a bit unique. We’ll walk you through it.
How to Charge the Geekvape B60
To charge the Geekvape B60, connect the device to your computer using the included USB-C cable. The animated battery gauge on the display will let you know when the device is fully charged.
How to Fill the Geekvape B60 Pod

To fill the Geekvape B60 pod, flip open the filling port at the top of the pod with your fingernail. Add e-liquid until the pod is nearly full and close the port. If you’re filling the pod for the first time or have just installed a new coil, wait several minutes before vaping.
How to Replace the Geekvape B60 Coil

To replace the Geekvape B60 coil, remove the pod from the device and turn it upside down. On the underside of the pod, you’ll see the base of the coil. You can grasp the coil’s base with your fingers and pull it out, or you can use the coil removal tool included with the Geekvape B60 kit. Push the coil all the way in and replace the pod.
How to Vape with the Geekvape B60
After charging the device and filling the pod, you’re ready to begin using the Geekvape B60 – but before you get started, remove the pod from the device and look for a sticker covering the bottom of the coil. The sticker is there to prevent the coil from activating accidentally in shipping. Remove the sticker and discard it.
If the device’s screen isn’t on, you’ll need to turn it on. You can do that by pressing the fire button five times. Once you’ve done that, you’re ready to vape. Hold the fire button while puffing on the pod’s mouthpiece.
If you want to change the Geekvape B60’s settings, you can adjust the wattage using the adjustment buttons below the device’s screen. The Geekvape B60 starts out at a power level of just 5 watts to prevent burning the coil. To change vaping modes, press the fire button three times to enter the device’s menu system.
How to Fix Problems with the Geekvape B60
If you already own the Geekvape B60, this part of our instruction manual is for you. In it, we’ll explain how to troubleshoot some of the common problems that you might encounter with this unique pod mod.
Geekvape B60 Not Hitting
If your Geekvape B60 isn’t hitting when you press the fire button, don’t panic. This device has a few unique features and quirks, and you’ll probably find that it’s very easy to get your device working.
- Check the underside of the pod. Did you remove the sticker? If not, do so and try using the device again.
- Does the device do nothing at all when you try to vape? It’s probably turned off. Turn the Geekvape B60 on by pressing the fire button five times.
- Does the screen say “Locked” when you try to vape? Flip the switch on the side of the Geekvape B60 to unlock the device.
- Does the screen say “Low Voltage” when you try to vape? Charge the battery fully before vaping again.
- Does the screen say “No Atomizer” when you try to vape? Remove the pod and make sure that the coil is pushed in all the way. If you see e-liquid in the chamber under the pod, dry the Geekvape B60 thoroughly with a paper towel. If the issue continues, install a new coil.
Geekvape B60 Not Charging
If you don’t see a battery animation on the screen when you connect the device to your computer, your Geekvape B60 isn’t charging. Here’s what you should do next.
- Charge the Geekvape B60 only by connecting it to your computer. Although this device supports 2-amp charging, you should still avoid using a wall adapter because some wall chargers may be incompatible with the device.
- Try charging the Geekvape B60 with a different USB-C cable.
- Remove dust and lint from the device’s charging port with a toothpick.
Geekvape B60 Tastes Burnt
If you get a burnt flavor from your Geekvape B60, there’s no need to panic. Follow these steps to fix it.
- Reduce the device’s wattage. Although the Geekvape B60 operates at up to 60 watts, not all coils will work well at that power level.
- Make sure that the pod is full. If the pod is nearly out of vape juice, you’ll get a burnt flavor.
- Install a new coil. When the coil is covered with e-liquid residue, it’ll start to taste burnt. You can expect to replace the Geekvape B60 coil every several days.
Geekvape B60 Leaking
Have you removed the pod from your Geekvape B60 and found e-liquid under it? Dry the leak completely and make sure that the coil is pushed all the way into the pod. If the leak persists, install a new coil – and if the problem continues, it’s probably time to begin using a new pod.